Xero Accounting
Integration Support
Ph: 878 313 2388
info@apexproddev.wpengine.com
Mon – Fri, 8:30am to 5:30pm ET
Connecting to Xero
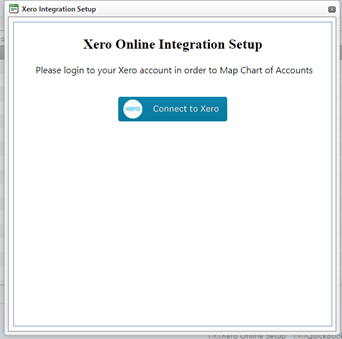
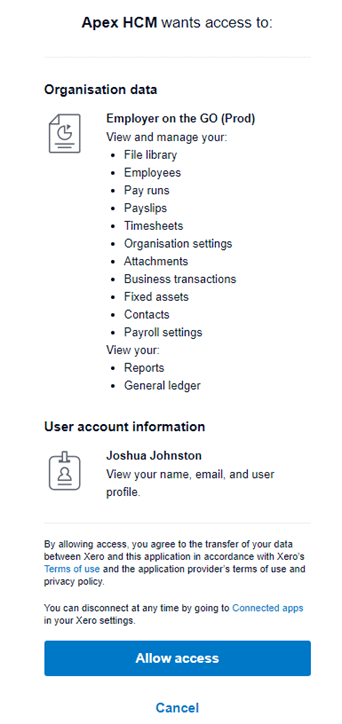
Simply click the “connect to Xero” button, and you will then be directed to the next screen, which will ask you to enter your credentials. After entering your credentials, Xero is going to ask you for permission to share data with Apex HCM. The screen should look like the below.
Mapping Basics
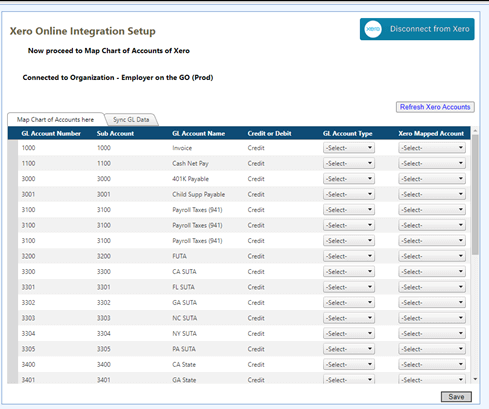
In order for the accounts to populate in the drop down, you must first select the “GL Account Type” of the account you are looking to map to.

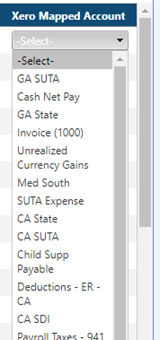
From here, you can select the account that you wish the GL account in Employer on the GO to map to in Xero.
There are limitations in which accounts can be mapped to as well as what their set up has to include in Xero, which we will discuss now. Currently, you can only map to Xero accounts that have one of the types listed below:
- Expense
- Liability
- Asset
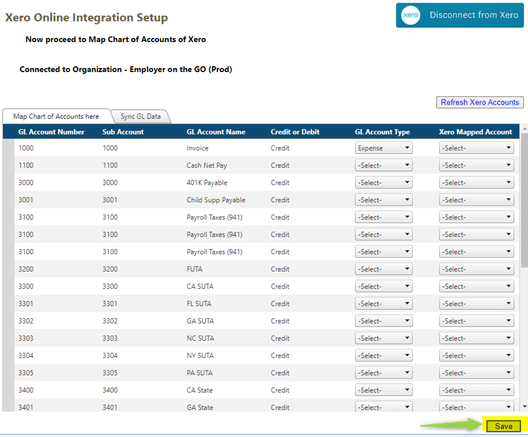
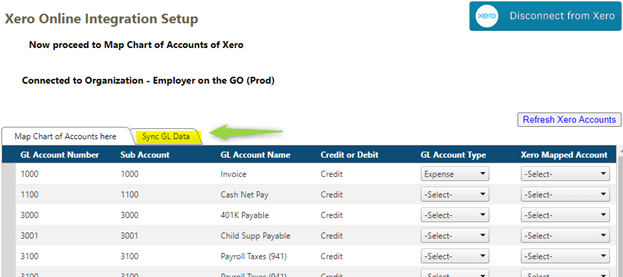
You will need to complete this process for each and every account in order to progress to the next step. Once you have done so, you will be able to move onto the “sync” page and select which pay date that you wish to have data pushed into Xero for.One process that we would suggest, especi
ally for those Setup with a large number of accounts, is to take advantage of the “Save” feature. This will save the accounts that are currently mapped should your screen freeze up, you accidentally navigating to another page, or the screen timing out as examples. The save button is located in the bottom right of the screen, shown below.
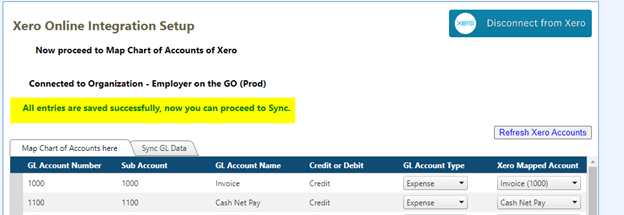
Upon Successfully mapping all of the accounts and hitting save, you will be greeted with the below message:
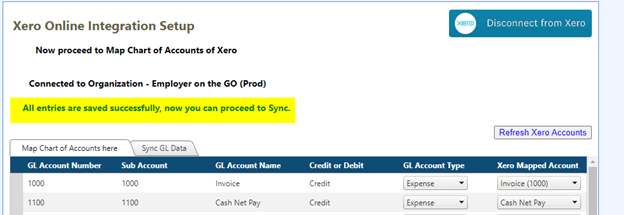
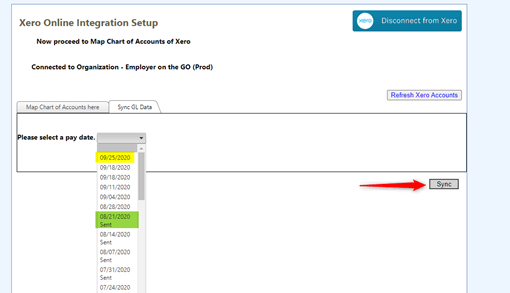
At this point, you can move to the sync GL data tab mentioned prior. Upon moving to the tab, you will then be prompted to pick a pay date to sync.
You may notice in the image below that there are two dates highlighted. The one highlighted yellow, is a date that has yet to be synced. The one highlighted green, is a date that has already been synced. One should also notice that, once a date has been synced, its date in the dropped down is followed by “Sent”. This serves to help you make sure that you are picking the right paydate and not sending the same dates over again causing duplicate entries to show up in Xero.
Advanced Mapping Set Up
Outside of what was just covered, there are additional features and functionalities that can be used in order to tag or push data at a more granular level. These features are as follows:
- Detail Line Mapping
- Tracking Code 1
- Tracking Code 2
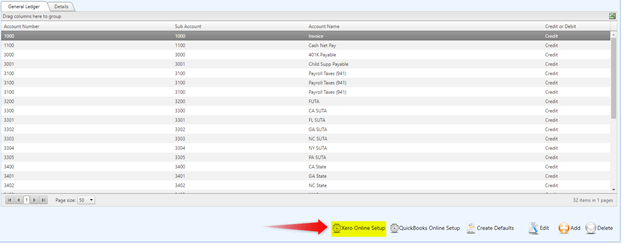
These features are “tagged” in the Employer on the GO GL Account Setup screen. From the same screen that you initiate the connection to Xero, you can also choose to edit an account instead. You can do this, by clicking on the account to highlight it, and hitting edit in the bottom right hand corner. You will then be taken to a screen as the one below.
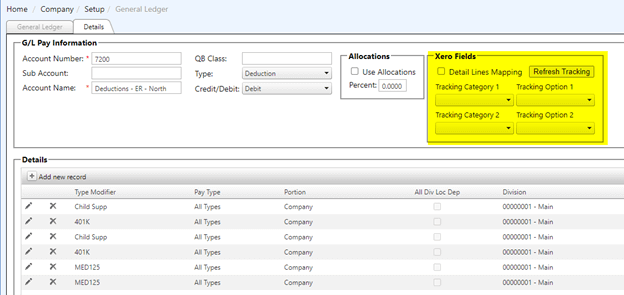
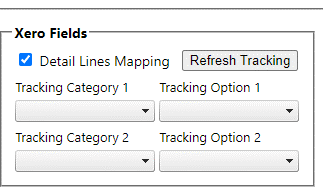
The highlighted area is where we are going to focus our attention now. First, we will talk about the “Detail Line Mapping” and then move onto the tracking categories.
Detail Line mapping is an option that allows you to more granularly push data into specific accounts. For example, we see that there are six(6) detail lines that are specifying what data is to be pulled into this account. If you have need to map the detail lines to different accounts, that can be done by checking the “Detail Lines Mapping” box before going into the Xero setup screen. This will result in the setup screen below.
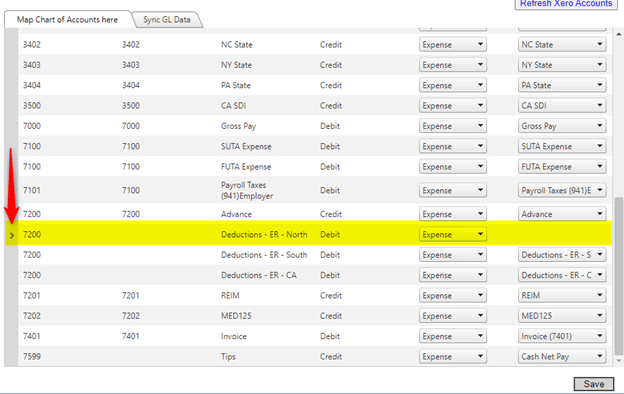

In the image above, you can see that you now have the option to select an individual account for each detail line that is included in the GL Account. Each user would have their own reasons for using this functionality. As an example, any user might want to tag all of these to the same tracking category, but need different GL accounts. In this scenario, this could be done. It might also be used just as a way to speed up the set up of accounts in EOG, though this would be discouraged.
****Note, if you do select Detail Line Mapping for one account, you must do so for all accounts in order for it to sync. This update for this limitation will be released shortly.****
Tracking Categories are available in order to tag the data to specific places in Xero. Its up to the user how they have their categories set up in Xero, but the most common example would be that of tagging accounts to locations and departments. You will notice that there are four(4) fields regarding tracking categories available to each account. This is done to allow you to specify which type of tracking category you want to use and then pick from the values of the category from Xero.
